Tutorial: Pose Creation (Practice)
We will now show you how to make the poses below.
We recommend that fist time users follow along in DesignDoll.
If you make a mistake, you can undo your last step by pressing [Ctrl+Z].


Click on the Pose tag in the object list (upper right).

Holding down the right mouse button on the 3D (main) screen, drag the camera view until the model is facing forward.
Drag part of the model’s chest to the left, to create a slight twisting of the upper body.
(Remember, you will be draging the model itself, not a controller.)

Before ver5.3
or
Simple Controller
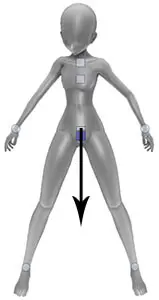
In order to created a slight stooping, click on the hip controler.
Then drag the small, pale colored box controller down, to bend the model’s back.
You can get a feel for the progression of the bending by looking at the mini-view at the lower right.

After ver5.3

Drag the right shoulder up.
In the same manner, drop the left shoulder.

To give the impression of carrying weight, shift the right shoulder slightly forward.
Since this is a little difficult to do from the front, rotate the camera view around to the side.

While it’s a little different than the order described in POSE CREATION (PROCESS) we’ll adjust the head and neck here, to facilitate envisioning the finished product more easily.
When you click on the head, a controller that looks like a head brace will appear.

Using the light gray horizontal ring, rotate the head towards the model’s right.
Next, use the medium gray ring, running up & down the front of the model’s face, to lower the face towards the right shoulder.

We’ll now move the arms.
Since we’ve already positioned the shoulders, let’s uncheck the shoulder link (found at about the middle of the right hand side of the screen).
Move the right arm by the model’s hip.
If you work from directly in front of the model, use the mini-view to monitor depth.

Move the left arm to about the model’s right elbow.
While the arm will temporarily be embedded in the model’s torso, we will come back to modify that shortly. For now, just concentrate on positioning the model’s left wrist near the right elbow.

Before ver5.3
or
Simple Controller
Using the pale ring controller, adjust the angle of the model’s left arm.

After ver5.3

Finally, we will adjust the lower half of the body.
While it would be okay to the legs in the same way as the arms, this time we’ll introduce another method.
First off, with the camera in front of the model, click and drag a box around the model’s upper body & hips, using the left mouse button.

Since we are now interested in adjusting the depth of the model, we’ll use the red controlers on the mini-view.
Drag the red controlers towards the model’s backside and down, to create a seated position.
Selecting multiple controllers in this manner is useful for times when you want to move multiple parts together.

To release the selection, click on an empty area.
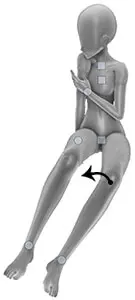
Drag the left leg towards the monitor’s left side.

Like a figurine, you can also drag the knee of the model directly.
Drag the model’s left knee to the left, so that it sits in front of the model’s right hip.

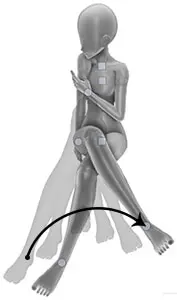
Move the right leg in the same manner, or use the pale ring controller, instead of direct knee manipulation.


However, the knee’s position will change depending on how you move the controller.
If you consider the trajectory of your movements, you can more efficiently adjust the pose of your models.

Now that we have the rough positioning of our controlers taken care of, we can move on to fine tuning our pose.
Since the center of gravity is not right, we’ll need to adjust that.
Easily adjusting the center of gravity afterwards is one of DesignDolls special features
Position the camera in front of the model, then the square controller on the model’s chest slightly to the left.

Even with this, there is no real feeling of a body weight shift, so lets adjust the center of gravity from the chest up.
First, drag and select the upper body controllers, as we did before, when creating the seated position.
Next, hold [Ctrl] and click on the hip controller, to unselect it.
(Using [Ctrl] can be convenient, when unwanted controllers are close to those you want to select.)
In this condition, you can drag the selected controllers and easily shift the center of gravity of your model’s upper body.

Without throwing off the balance of your entire model, drag the controllers down, and to the left.
While the positioning of the model’s elbow, etc, might shift somewhat during this move, focus on adjusting the model’s center of gravity for now, and we’ll fix the details later.

Moving the camera around, make fine adjustments to your model’s face, wrists, ankles, etc, to finish up. (To complete your pose, you’ll want to adjust the hand tag as well.)
No matter what the pose, the process is the same, so once you get used to the controls, you should be able to create the pose you want in 2-3 minutes.