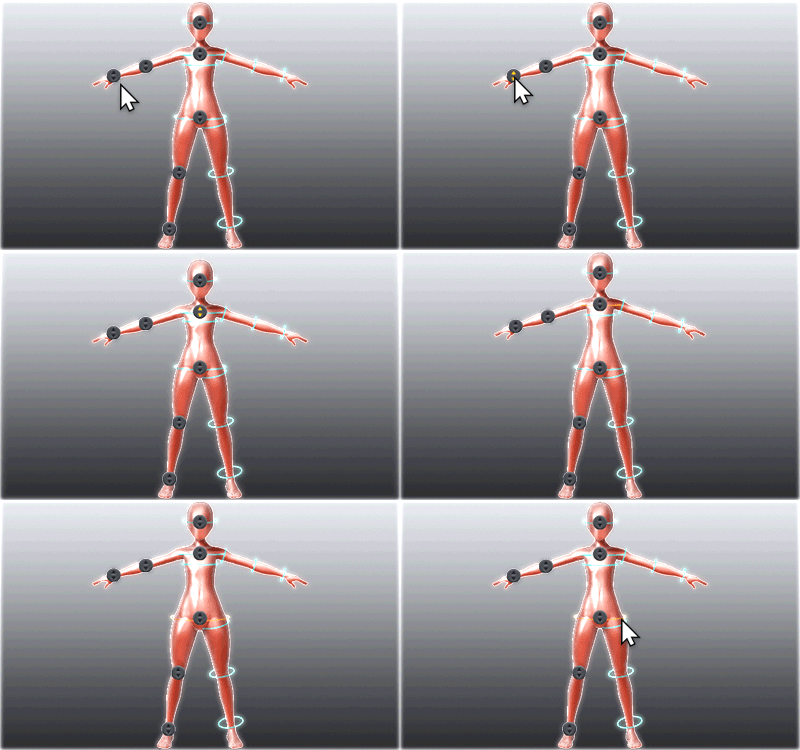
Introduction to Changing Model Body Types
・Change the shape of the face and muscles using the “Morphing” tag.
・Adjust the head & body, using the “Scale” tag. (Perfect your body type in Detail Adjustment Mode, after making rough changes in Simple Adjustment Mode.)
・It does not matter what order you use the “Morphing” or “Scale” tags
Adjusting the Head & Body (Simple Adjustment Mode)
First Step
Click the Scale tag.

Second Step
Click the Simple Adjustment Mode.

Third Step
Adjust the length and thickness of parts by dragging.
| Circles | : Length |
| Rings | : Thickness |

Adjusting the Head & Body (Detail Adjustment Mode)
First Step
Click the Scale tag.

Second Step
Click the Detail Adjustment Mode.

Third Step
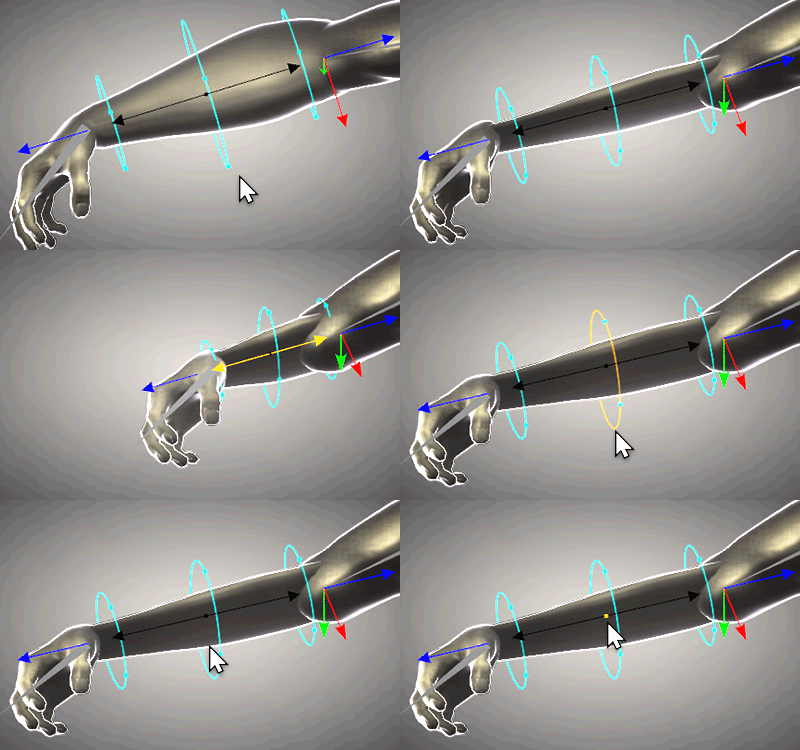
Click the bone you want to adjust.
Fourth Step
Drag controllers to make detail adjustments.
| Black arrow | : Length |
| Ball in the middle of the bone | : Expand or shrink the whole bone |
| Rings | : Thickness (X & Y axis simultaneously) |
| Balls on the Rings | : Thickness (X or Y axis independently) |
| XYZ arrows | : Bone starting or ending point |

Adjusting the Fingers
First Step
Click the Scale tag.

Second Step
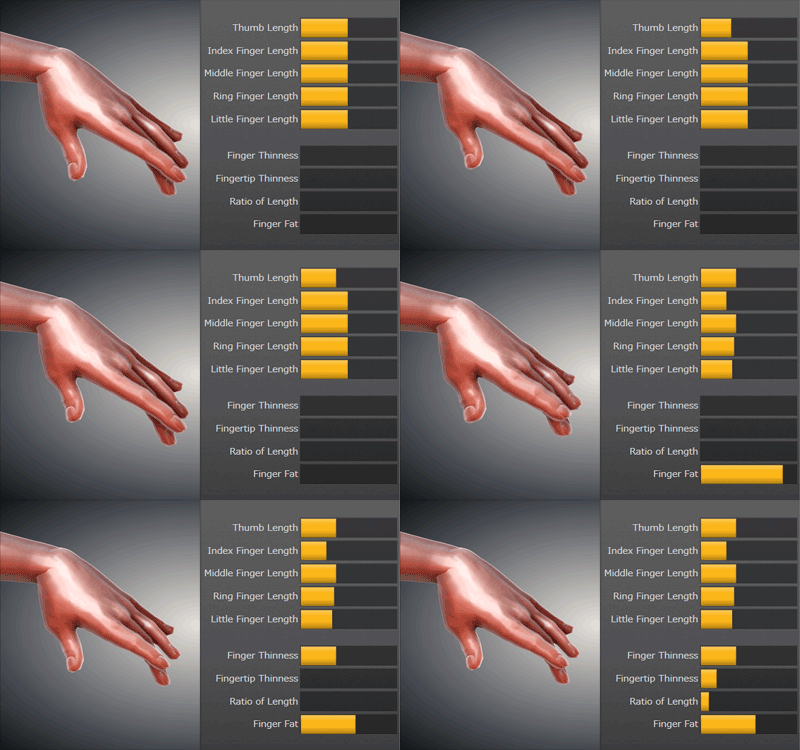
Click the Hand mode.

Third Step
Drag the sliders.

While adjusting the scale of a model, the approximate height and number of heads tall of the model is displayed.(Detail Adjustment Mode)
With one model selected, to select additional models, simply hold [Ctrl] and click on the additional model(s) in the 3D view or tag menu.
With multiple models selected, if you right click on the tag menu (upper right) for one of the models, then click “Mix Model,” DesignDoll will merge the selected models into one new model that blends the characteristics of the selected models.